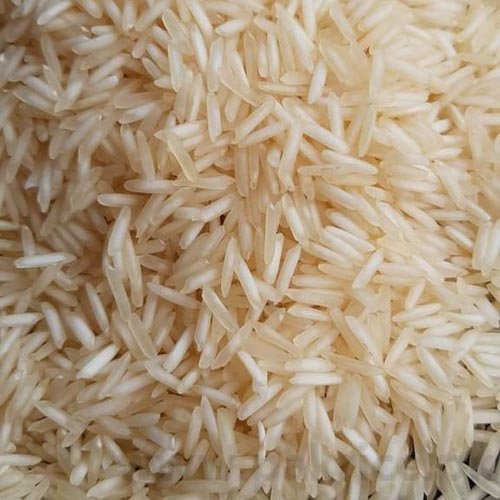
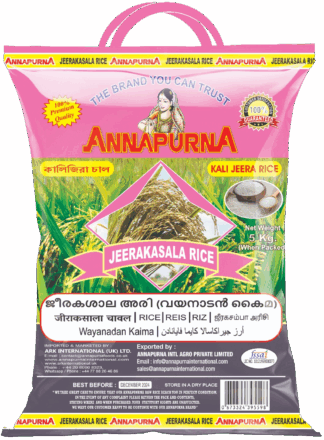
Experience the authentic taste and aroma of 1121 Extra Long Basmati Rice from Annapurna International. Our premium-quality basmati rice is carefully selected from the finest farms to deliver exceptional length, rich fragrance, and delicious flavor in every meal. Whether you’re preparing biryani, pulao, fried rice, or everyday dishes, our rice ensures a perfect cooking experience every time.
Why Choose Annapurna 1121 Extra Long Basmati Rice?
Extra-long grains that elongate beautifully after cooking
Naturally rich aroma and authentic basmati taste
100% Premium Quality
Consistent quality in every pack
Hygienically processed and carefully packed
Ideal for biryani, pulao, festive meals, and daily cooking
Soft, fluffy, and non-sticky texture after cooking
Carefully sourced from trusted growers
No compromise on quality
Trusted by families, restaurants, and food businesses
Our Promise
At Annapurna, quality is our highest priority. Every pack of our 1121 Extra Long Basmati Rice undergoes strict quality checks to ensure superior taste, consistency, and customer satisfaction.
Our Commitment
100% Quality Assurance
Consistent Grain Size and Purity
Superior Aroma and Taste
Premium Packaging for Freshness
Customer Satisfaction Guaranteed
Money-Back Guarantee* (subject to our return policy)
Benefits of 1121 Extra Long Basmati Rice
Premium extra-long grains
Excellent cooking performance
Rich natural aroma
Light, fluffy, and separate grains
Perfect for Indian and international cuisines
High customer satisfaction
Suitable for home kitchens, hotels, caterers, and restaurants
Why Customers Trust Annapurna Brand
Thousands of customers choose Annapurna because we deliver premium-quality basmati rice with consistent excellence. We never compromise on quality, ensuring every meal is memorable.
Must Try Annapurna International 1121 Extra Long Basmati Rice
If you’re looking for premium basmati rice with exceptional quality, authentic aroma, and outstanding consistency, Annapurna International 1121 Extra Long Basmati Rice is the perfect choice.
If you have ever stood in front of a rice shelf wondering what Sona Masoori rice is actually used for, you are not alone. It is one of the most commonly bought rice varieties in India. Yet many people still ask the same question.
What is Sona Masoori rice used for. Is it only for South Indian food. Is it good for daily use. And can it fit into a weight conscious diet.
The short answer is yes. But the real value lies in understanding why.
Let us break it down in a simple and practical way.
What Is Sona Masoori Rice
Sona Masoori rice is a medium grain rice variety grown mainly in the southern parts of India, especially Andhra Pradesh and Telangana.
It is lighter than many polished white rice varieties. It has a mild aroma. And when cooked properly, it turns soft and fluffy without becoming sticky.
Because of these qualities, it has quietly become a daily staple in millions of Indian homes.
Why Sona Masoori Rice Is So Widely Used
The popularity of Sona Masoori rice is not accidental. It fits everyday cooking needs very well.
Here is what makes it different.
It cooks quickly
It feels light on the stomach
It absorbs flavors instead of overpowering them
It works well with simple meals and elaborate dishes
This balance is the reason people reach for it again and again.
What Is Sona Masoori Rice Used For in India
In India, Sona Masoori rice is mostly used for everyday meals. Not festival cooking. Not occasional indulgence. But daily comfort food.
Daily Home Meals
This is where Sona Masoori rice shines the most.
Steamed rice with dal
Rice with sambar or rasam
Rice served with vegetable curries
Simple curd rice
The grains stay soft. The rice does not feel heavy. And the meal feels complete without being overwhelming.
South Indian Rice Dishes
Sona Masoori rice is a natural choice for many South Indian preparations.
Lemon rice
Tamarind rice
Coconut rice
Because the grains absorb seasoning well, the flavors come through clearly without turning mushy.
Comfort Foods
For light and soothing meals, this rice is often preferred.
Khichdi
Soft rice porridge
One pot vegetable rice
These dishes are easy to digest and commonly recommended during recovery or when appetite is low.
What Is Sona Masoori Rice Used For Cooking Beyond Traditional Meals
Sona Masoori rice is not limited to traditional Indian cooking.
Many people now use it for:
Simple fried rice
Rice bowls with vegetables and protein
Lunchbox meals
Light biryani styles meant for regular days
Its neutral taste allows it to adapt to different cuisines without clashing with spices or sauces.
Is Sona Masoori Rice Good for Daily Use
Yes. And this is one of the main reasons people choose it.
Sona Masoori rice is commonly eaten every day in Indian households.
It feels lighter compared to heavier rice varieties. It does not cause that overly full feeling after meals. It works well for all age groups including children and elders.
From a practical standpoint, it is a rice you can comfortably eat often without feeling weighed down.
Is Sona Masoori Rice Good for Weight Loss
This is a common question. And the answer needs honesty.
No rice alone causes weight loss. But some rice varieties are easier to manage than others.
Sona Masoori rice is often considered a better option because:
It feels lighter than highly polished rice
It encourages portion control naturally
It pairs well with vegetables and protein rich foods
When eaten in moderation and as part of a balanced meal, it fits well into a weight conscious lifestyle.
The key is quantity and overall diet, not just the rice itself.
How to Cook Sona Masoori Rice Properly
Cooking it right makes all the difference.
Basic Method
Rinse the rice two to three times to remove excess surface starch
Use one cup of rice to two cups of water
Cook until the grains are soft but not broken
Let the rice rest for a few minutes before serving
Helpful Tips
Do not over soak the rice
Avoid too much water
Fluff gently after cooking
When cooked properly, the grains remain separate and soft.
Common Mistakes People Make
Many people think they do not like Sona Masoori rice. In reality, it is often a cooking issue.
Common mistakes include:
Using excess water
Overcooking until the grains break
Expecting a strong aroma like basmati
Skipping the rinsing step
Once these are corrected, the texture and taste improve significantly.
A Note From Experience
Working closely with families and long term rice buyers, one thing becomes very clear. People who choose Sona Masoori rice are not looking for showy meals. They are looking for reliability.
They want rice that cooks the same way every day. Rice that suits all age groups at home. Rice that works for lunch, dinner, and simple comfort meals.
That consistency is what keeps them coming back to this variety year after year.
How Sona Masoori Rice Fits Modern Lifestyles
Today, meals need to be quick, flexible, and comforting.
Sona Masoori rice fits easily into modern routines.
It is meal prep friendly
It pairs well with simple home cooking
It adapts to different cuisines
It does not require special handling
That is why it remains relevant even as food habits evolve.
Frequently Asked Questions
Is Sona Masoori rice sticky? No. When cooked properly, it stays soft and fluffy.
Can it be used for biryani? Yes, for lighter everyday biryani styles.
Is it suitable for children and elders? Yes. It is commonly preferred because it is easy to digest.
Can it be eaten daily? Yes, it is widely consumed daily in Indian households.
Final Thoughts
So, what is Sona Masoori rice used for.
It is used for daily meals. It is used for comfort food. It is used for simple and balanced cooking.
Its strength lies in being practical, reliable, and easy to live with.
If you are looking for a rice that quietly supports everyday cooking without demanding attention, Sona Masoori rice does exactly that.
There comes a time when most of us pause and think about what we are feeding ourselves and our families. Food is not just about filling the stomach. It is about nourishment, energy, comfort, and sometimes even memories.
If you are exploring different types of rice and wondering whether Ambemohar riceis a healthy choice, you are not alone. Many home cooks want healthier options but still want something soft, flavourful, and easy to digest.
Let’s take a gentle and clear look at Ambemohar rice, its benefits, and whether it fits into a healthy daily diet.
What Makes Ambemohar Rice Special?
Ambemohar rice is known for its unique natural aroma that resembles mango blossoms, which is where its name comes from: Ambe meaning mango, and Mohar meaning blossoms.
People love it for:
Its soft texture
Quick cooking time
Mild flavour
Easy digestibility
It has been a part of Maharashtrian homes for generations and is often used in comforting dishes like varan bhaat, curd rice, khichdi, and festival meals.
It feels homely — and that is one of its strengths.
Nutritional Profile of Ambemohar Rice
While nutritional values can slightly vary depending on farming and polishing, an approximate value per 100 grams cooked may include:
Carbohydrates: 28 to 30 grams
Protein: 2 to 2.5 grams
Fat: Less than 1 gram
Fiber: Low to moderate
Vitamins: B-complex vitamins (small amounts)
Minerals: Potassium, magnesium, calcium in trace amounts
It is not a superfood. It is not a miracle grain. But it is a simple food that supports easy digestion and comfort.
Health Benefits of Ambemohar Rice
Here are some gentle but meaningful advantages:
Easy on digestion
Ambemohar rice becomes soft when cooked, making it great for people recovering from illness, those with digestive sensitivity, children, and older adults.
Supports heart health
Because it is naturally low in fat and contains trace minerals like potassium, it can support heart health when eaten in balanced portions.
Sluten free and gentle for sensitive eaters
If someone in your family avoids gluten due to sensitivity, Ambemohar rice is a friendly option.
Comforting and satisfying
Aromatic food plays a role in mental well being too. Comforting meals help reduce stress around eating, especially for those trying to eat healthier without feeling deprived.
Moderately supportive for blood sugar balance
It is still a polished white rice, so portion control matters. Pairing it with vegetables, lentils, or protein can help manage blood sugar release.
Is Ambemohar Rice Better Than Regular White Rice?
Both are white rice, but Ambemohar has a few differences:
Feature
Regular White Rice
Ambemohar Rice
Aroma
Mild
Strong mango blossom aroma
Texture
Firm or fluffy
Soft and delicate
Digestion
Moderate
Very easy
Cooking Time
Varies
Quick
So while the nutritional content is somewhat similar, the digestibility and natural aroma make Ambemohar a preferred choice for many households.
Who Can Benefit the Most?
Ambemohar rice may be an especially good choice for:
Children
Pregnant women
Elderly adults
People with weak digestion
Anyone who enjoys soft, comforting food
For diabetics and individuals managing weight, mindful portion size is key.
How to Include Ambemohar Rice in Your Daily Meals
You can enjoy it in simple and wholesome recipes such as:
Khichdi
Curd rice
Varan bhaat (dal and rice)
Pongal
Light pulao
Steamed rice with homemade curry
A useful tip: Instead of eating a large bowl of plain rice, serve a smaller amount and fill the plate with:
Dal or protein
Cooked vegetables
A small salad
A spoon of healthy fat like homemade ghee
This keeps the meal balanced and nourishing.
Things to Keep in Mind
Ambemohar rice is healthy when eaten mindfully, but:
It is not a whole grain
Excessive amounts may spike blood sugar
It should ideally be part of a balanced meal
No food needs to be feared — we just need to eat intentionally.
Frequently Asked Questions
Is Ambemohar rice healthy for everyday use? Yes, it can be part of a balanced daily diet when eaten with vegetables, lentils, and protein.
Can diabetics eat Ambemohar rice? Yes, but portion control matters. Pairing it with fibre and protein is recommended.
Is Ambemohar rice gluten free? Yes. Like most rice varieties, it contains no gluten.
Is Ambemohar rice good for weight loss? It can be included in a weight management diet when servings are controlled and paired with high fibre and protein foods.
How often can I eat it? Several times a week is fine if the meal is balanced and portion size is reasonable.
Final Thoughts
Ambemohar rice may not be the most popular rice variety everywhere, but it has its own charm. It brings aroma, softness, and a sense of calm to a meal. And sometimes, that matters just as much as nutrition.
If you are looking for a rice that is comforting, easy to digest, gentle on the stomach, and versatile in everyday recipes, Ambemohar rice can be a wonderful choice.
We live in a time when more people are looking back at traditional food habits to find real nourishment. Among the many forgotten grains making a comeback, hand-pounded rice is quietly reclaiming its place on the Indian plate.
Suppose you’ve ever wondered what makes it special or how it compares to regular white rice. In that case, this post will help you understand its nutrition, benefits, weight loss connection, and possible side effects — all in simple, practical terms.
What Is Hand-Pounded Rice?
Before machines took over, rice was traditionally pounded by hand to remove the outer husk while keeping the nutritious bran layer mostly intact. This process gives the rice a slightly brownish tint and a nuttier flavor.
In contrast, modern milling techniques polish the rice to make it look white and shiny — but this process removes much of its fiber and nutrients. Hand-pounded rice may not look as refined, but it’s the version that stays true to nature.
Visual idea: A close-up image showing hand-pounded rice beside polished rice — the color and texture difference tells the story itself.
Hand-Pounded Rice Nutrition Facts
One of the main reasons people are switching back to hand-pounded rice is its nutrition profile. Because it’s only semi-milled, it retains the goodness that gets lost in processing.
Here’s what 100 grams of cooked hand-pounded rice typically contains:
Calories: Around 110–130
Carbohydrates: 24–26 g
Protein: 2–3 g
Fiber: 1.5–2 g
Fat: Less than 1 g
Rich in: Iron, magnesium, zinc, B-vitamins, and antioxidants
The slightly higher fiber and mineral content make it more balanced than white rice. It digests slowly, giving steady energy rather than quick spikes and drops in blood sugar.
Hand-Pounded Rice Benefits
1. Improves Digestion and Gut Health
Because it retains some of its bran, hand-pounded rice has natural fiber that supports digestion and helps prevent constipation. It also promotes healthy gut bacteria, which plays a vital role in overall wellness.
2. Helps Maintain Steady Energy
Unlike refined white rice, which gets digested quickly, hand-pounded rice releases energy slowly. You stay full longer, feel more energetic through the day, and avoid sudden hunger pangs.
3. Supports Heart Health
The fiber in hand-pounded rice may help reduce bad cholesterol levels. It’s also low in sodium and contains magnesium, which supports healthy blood pressure.
4. Keeps Blood Sugar Levels Stable
With a lower glycemic index compared to polished rice, it helps in maintaining stable blood sugar. This makes it a good option for people trying to manage diabetes or reduce sugar intake.
5. Encourages Sustainable Eating
By choosing hand-pounded rice, you support local farmers and traditional milling practices. It’s food that not only nourishes you but also keeps old, sustainable methods alive.
“Good food doesn’t need to be fancy. It just needs to be real.”
Hand-Pounded Rice Benefits for Weight Loss
Many people today are replacing white rice with hand-pounded rice in their weight-loss journey — and for good reason.
Here’s why it helps:
High in fiber: You feel full for longer, reducing unnecessary snacking.
Low glycemic index: Keeps your insulin levels steady, which is important for fat metabolism.
Satisfying texture: Its slightly firm texture slows down eating, giving your brain time to register fullness.
However, it’s not a magic food. Weight loss depends on your total diet and lifestyle. Hand-pounded rice can support your goals when eaten in the right portions, preferably paired with vegetables, lentils, and protein.
If you’re used to white rice, start small — mix half and half. Over time, your taste buds and body will adjust naturally.
Hand-Pounded Rice Side Effects: What You Should Know
While hand-pounded rice has plenty of benefits, being aware of a few points ensures a balanced view.
Heavier for some people: Because it contains more fiber and bran, it can feel slightly heavier on the stomach, especially for those with sensitive digestion or recovering from illness.
Storage care: Natural oils in the bran layer can turn rancid faster in humid conditions. Store it in a cool, dry place in an airtight container.
Cooking time: It takes slightly longer to cook, so soaking it for 20–30 minutes helps soften the grains.
These are not exactly “side effects” but practical considerations. For most people, hand-pounded rice is completely safe and healthier than over-processed varieties.
How to Include Hand-Pounded Rice in Your Diet
You don’t need to make a dramatic switch overnight. Start by introducing it into familiar dishes.
Replace white rice in your everyday meals once or twice a week.
Try traditional recipes like pongal, idlis, khichdi, or lemon rice.
Use it for salads or rice bowls for a slightly nutty taste and texture.
Adding a drizzle of ghee or coconut oil can make it softer and easier to digest.
Visual idea: A bright image of a homely meal — hand-pounded rice served with dal, vegetables, and curd.
Real Insights from Nutrition Experts
Nutritionists often emphasize variety, balance, and moderation. Hand-pounded rice fits perfectly within that philosophy. It’s not about eliminating polished rice, but about understanding how traditional grains contribute to long-term health.
According to a study published in Food Science & Nutrition, rice varieties that retain their bran layer contain higher levels of antioxidants and essential nutrients. These natural compounds help protect cells from oxidative stress and support better metabolic health.
That’s the kind of quiet strength traditional foods offer — nutrition rooted in simplicity.
Final Thoughts: Bringing Tradition Back to the Table
In a world that often confuses convenience with health, hand-pounded rice reminds us that the simplest choices can sometimes be the most nourishing.
It may take a little longer to cook, and its earthy flavor might need a bit of getting used to, but once you do, it becomes a beautiful reminder of balance — the kind our grandparents practiced without ever calling it a “diet.”
Switch to hand-pounded rice, not because it’s trending, but because it’s time-tested. Eat mindfully, appreciate what’s on your plate, and let food do what it’s meant to — keep you well, naturally.
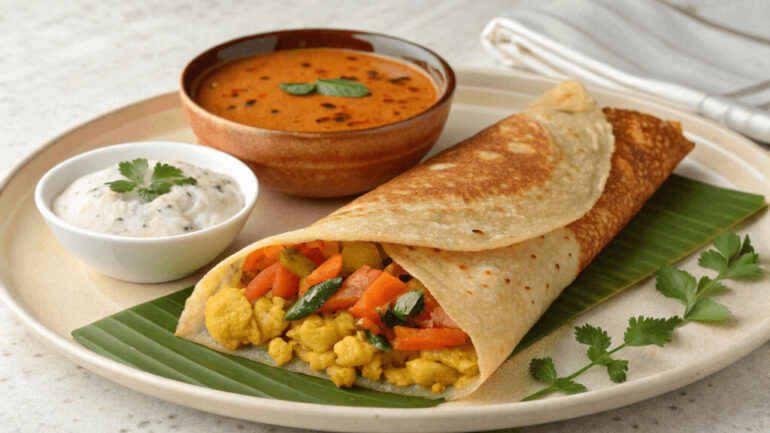
Masala dosa with sambar is one of the most loved South Indian dishes. The combination of crispy dosa, spiced potato filling, and a flavorful bowl of sambar is enjoyed across India and worldwide. It is a wholesome meal that brings together taste, nutrition, and tradition.
While many people enjoy masala dosa in restaurants, preparing it at home is easier than expected. The secret to an authentic taste lies in the sambar, where the spice blend defines the flavor. With Annapurna Sambar Masala, you can achieve the perfect balance of taste and aroma in every serving. This guide explains step by step how to make masala dosa sambar Indian style.
Why Masala Dosa with Sambar is Unique
Masala dosa and sambar are more than just a meal. They are part of South Indian culinary heritage. The dish balances flavors and nutrition — dosa provides energy, potato masala adds comfort, and sambar contributes protein, fiber, and the benefits of fresh vegetables.
Authenticity in sambar comes from the masala blend. A carefully chosen mix of spices creates the distinctive aroma and depth of flavor. Annapurna Sambar Masala has been crafted with this traditional balance in mind, ensuring that the sambar complements dosa perfectly.
Wash and cook the toor dal with turmeric until soft. Mash and keep aside.
In a pot, cook the vegetables in tamarind water until tender.
Add the cooked dal, salt, and Annapurna Sambar Masala. Mix well and allow to simmer.
In a separate pan, heat oil, add mustard seeds, curry leaves, and red chilies. Once they splutter, pour this tempering into the sambar.
Let it simmer for a few minutes before serving.
Preparing the Potato Masala
Heat oil in a pan. Add curry leaves, green chilies, ginger, and onions. Cook until the onions are soft.
Add turmeric powder and mashed potatoes. Mix well with salt.
Set aside to use as filling.
Preparing the Dosa
Heat a flat pan or tawa. Spread a ladle of fermented batter in a thin circle.
Drizzle oil around the edges and cook until crisp.
Place the potato masala in the center, fold, and serve.
Tips for Best Results
Use fresh vegetables for richer flavor in sambar.
The consistency of sambar can be adjusted with water based on preference.
A spoon of ghee added just before serving enhances aroma and taste.
Always serve dosa hot to retain its crispness.
The Role of Annapurna Sambar Masala
Sambar is defined by its spice blend. Preparing it from scratch requires time and skill. Annapurna Sambar Masala is crafted from a traditional recipe, combining roasted spices in the right proportions. It ensures consistency, saves preparation time, and delivers authentic South Indian flavor every time.
Whether cooking for a family breakfast or a larger gathering, Annapurna Sambar Masala guarantees that every bowl of sambar has the same rich aroma and taste.
Conclusion
Masala dosa with sambar is a complete meal that combines tradition, nutrition, and taste. Preparing it at home is simple when the process is followed step by step. The dosa is crisp, the potato filling is comforting, and the sambar ties everything together.
With Annapurna Sambar Masala, achieving authentic Indian style sambar becomes easy and reliable. It brings the essence of South Indian cooking into every kitchen and ensures that the classic pairing of masala dosa and sambar is always satisfying.
Millets are slowly making their way back into Indian homes, and for good reason. They are light, healthy, and so easy to cook once you get the hang of it. Among them, Kodo millet—called Kodra in Hindi and Varagu in Tamil—is one of my favorites. It has been grown in India for centuries and is now getting the attention it truly deserves.
If you are wondering how to cook Kodo millet in a pressure cooker, you are in the right place. The pressure cooker method is quick, foolproof, and perfect for beginners. Let me walk you through the basics, step by step, and show you how to make it part of your everyday Indian meals.
What is Kodo Millet?
Kodo millet (Paspalum scrobiculatum) is one of the most traditional grains grown across India. It is light, easy to digest, and naturally gluten free. Rich in fiber and minerals, it keeps you full without feeling heavy.
Think of it as a healthier cousin of rice. You can swap it in wherever you normally eat rice—alongside dal, curries, or even in upma. From my experience as a millet supplier, people who try Kodo millet once usually come back for more because of how simple and versatile it is.
Prepping the Millet
Before you cook, spend a few minutes on these steps:
Wash well – Rinse 2–3 times to remove dust.
Soak if possible – 15 minutes of soaking makes it softer.
Check freshness – Good millet has clean grains and an earthy smell.
That’s it. Now you’re ready to cook.
How to Cook Kodo Millet in Pressure Cooker
Here’s the basic recipe most beginners start with.
Ingredients
1 cup Kodo millet
2.5 cups water
Salt to taste
Method
Wash and soak the millet for 15 minutes.
Add millet, water, and salt to the pressure cooker.
Cook on medium flame for 2 whistles.
Let the steam release naturally.
Fluff with a fork and serve.
👉 If you like it softer, add a little more water. For a grainier texture, stick to the 1:2.5 ratio.
Indian Style Variations
Once you’ve mastered the plain version, try these easy twists:
Tadka Millet – Add curry leaves, mustard seeds, and green chilies for a quick seasoned millet.
Vegetable Millet – Cook with carrots, peas, and beans for a wholesome meal.
South Indian Style – Serve it hot with sambar or rasam, just like rice.
Common Mistakes
Millet too mushy? You added extra water.
Too hard? Add a splash of hot water and cover for 5 minutes.
Turns sticky? Avoid stirring while it’s hot—fluff only after cooling a little.
Storage – Refrigerate leftovers and use within a day.
Serving Ideas
Kodo millet goes well with:
Dal, sambar, or rasam
Curd and pickle for a light dinner
Fresh salad for a modern twist
One cup of raw millet easily serves 2–3 people.
Conclusion
Cooking Kodo millet in a pressure cooker is simple and beginner-friendly. Once you try it, you’ll realize it can easily replace rice in your meals without losing taste.
We’ve seen so many of our customers enjoy this grain, and I’m sure you will too. If you’re looking for good-quality millet, we source and supply fresh grains directly from farmers.
Give this recipe a try and let me know how your millet turns out—I’d love to hear your experience.
If you want soft idlis, the first thing you need to get right is the rice. Not all rice is created equal — especially when it comes to making idlis.
So what is idly rice, and why is it different?
Idly rice is a short-grain parboiled rice that’s specially processed for better fermentation. It soaks faster, grinds smoother, and gives you that light, airy texture you’re aiming for. When you hear someone say, “These idlis melt in the mouth,” you can be sure they used the right kind of rice.
Over the years, we’ve fine-tuned our manufacturing process to retain just the right amount of starch and surface roughness, which helps the batter hold air during fermentation. That’s what gives you those soft, spongy idlis.
Types of rice and why others don’t work as well:
Raw rice: Can make idlis gritty or dry
Basmati: Too fragrant and long-grained — not ideal
Sona masoori: Okay in emergencies, but still not the same
Storage Tip:
Always store your idly rice in a cool, dry place in an airtight container. Moisture can ruin the rice’s natural balance and affect fermentation.
Key takeaway:
Start with good quality idly rice. It’s the base of everything else that follows.
Essential Idly Recipe Ingredients
Here’s what you’ll need for a basic, reliable idly recipe:
Idly rice – 4 cups
Whole urad dal (black gram, skinless) – 1 cup
Fenugreek seeds (methi) – 1 tsp
Water – As needed for soaking and grinding
Salt – To taste, added after fermentation
This ratio of 4:1 (rice to dal) gives the best balance of softness and structure. If your idlis are too sticky or flat, chances are the ratio was off.
What to look for when buying ingredients:
Urad dal should be white and fresh, not yellowish
Fenugreek seeds add flavor and help fermentation, especially in cooler climates
Use clean, filtered water — chlorine can sometimes mess with fermentation
Avoid:
Pre-ground rice flours or dal — these don’t ferment as well
Skipping fenugreek — it may seem small, but it makes a big difference
Key takeaway:
Stick to whole, fresh ingredients — especially good idly rice and urad dal — and don’t skip the fenugreek.
Step-by-Step: How to Make Idly Batter with Idly Rice
Let’s get into the heart of it: the batter. If you get this part right, you’re 90% there.
1. Soaking
Soak separately:
Idly rice – Soak for 6 hours
Urad dal + fenugreek seeds – Soak for 4 to 6 hours
Use enough water so everything is submerged. Don’t rush this step — soaking helps soften the grains and improve grindability.
2. Grinding
You can use a wet grinder or a powerful mixer-grinder.
First, grind urad dal:
Add small amounts of water as you go
Grind till it’s fluffy and light (you should see tiny air bubbles)
Transfer to a large bowl
Next, grind rice:
Aim for a slightly coarse texture (like fine sand)
Add to the same bowl
Mix well: Use your hand to mix the batters. It helps activate natural fermentation by adding beneficial bacteria from your skin — yes, really!
3. Water and Consistency
The batter should be thick but pourable. Think of thick pancake batter. Not too watery, not too dry.
4. Fermentation Secrets
Here’s where most people go wrong. Here’s how to get it right:
Temperature matters: Ideal is around 30°C (86°F). In colder places, place the batter in an oven with the light on or wrap it in a warm towel.
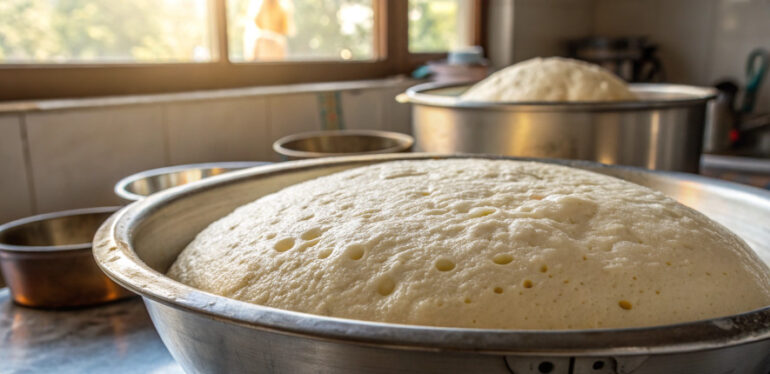
Fermentation time: Usually 8–12 hours. The batter should double in volume and smell mildly sour.
Signs it’s ready: Bubbly top, light texture, and a slight rise.
Key takeaway:
Good fermentation = soft idlis. Give it time and warmth.
Mastering the Fermentation Process
Let’s talk science for a second — but keep it simple.
Fermentation happens when natural bacteria and yeast break down the sugars in rice and dal. This process creates air pockets, which make your idlis rise and fluff up while steaming.
Environmental factors to keep in mind:
Cold weather slows fermentation
Excess salt before fermentation can stop the rise
Over-fermentation smells too sour and can make idlis collapse
Seasonal tips:
Winter: Add a pinch of sugar or keep the batter in a slightly warm spot
Summer: Shorten fermentation to 6–8 hours to avoid over-rising
Troubleshooting:
Batter didn’t rise? Warm it up a bit and give it 2 more hours.
Batter too runny? Mix in a bit of semolina (rava) or rice flour, then let it sit for 30 minutes.
Key takeaway:
Keep the batter warm and watch for doubling. That’s your sign it’s ready.
Cooking Perfect Soft Idlis
Finally, it’s time to steam!
Grease your idly plates lightly with oil or ghee.
Pour in the batter gently — don’t overfill.
Steam for 10–12 minutes on medium heat. Avoid opening the lid midway.
Let them sit for 2 minutes after steaming before unmolding.
Preventing sticky idlis:
Don’t use too much water in the steamer
Use fresh, well-fermented batter
Don’t over-steam — they’ll turn rubbery
Key takeaway:
Gentle steam, perfect timing, and a light hand with greasing give the best results.
Troubleshooting Common Idly Problems
Dense idlis?
Batter too thick or under-fermented
Urad dal not ground fluffy enough
Over-fermented batter?
Add a tablespoon of rava or mix it with fresh batter
Sticky texture?
Rice may not have been rinsed well
Steam time too long or steamer too wet
When to start over:
If it smells bad or looks discolored — don’t risk it
Otherwise, try adjusting the batter and give it one more shot
Key takeaway:
Most problems can be fixed — don’t toss the batter too quickly!
Expert Tips from Professional Idly Rice Expoters
Having seen what goes into rice from seed to sack, here are a few things we’ve learned:
Always rinse rice 2–3 times to remove excess starch
Use fresh stock — old rice doesn’t ferment the same
Drying and milling techniques impact how well rice absorbs water and grinds smoothly
Uniform grain size leads to even fermentation
In short, not all idly rice is the same. Ours is carefully processed to give home cooks the same results chefs expect in professional kitchens.
Key takeaway:
Choose rice from a trusted source — it shows in every bite.
Conclusion
Soft, fluffy idlis aren’t magic. They’re the result of good ingredients, the right technique, and a little care. With the tips and steps we’ve shared, you’re well on your way to becoming your family’s idly expert.
Don’t be afraid to experiment and learn — that’s how we all get better.
Ready to try? Use our premium-quality idly rice and taste the difference for yourself.
Ever feel like eating healthy means saying goodbye to your comfort food? Poha might just prove that wrong.
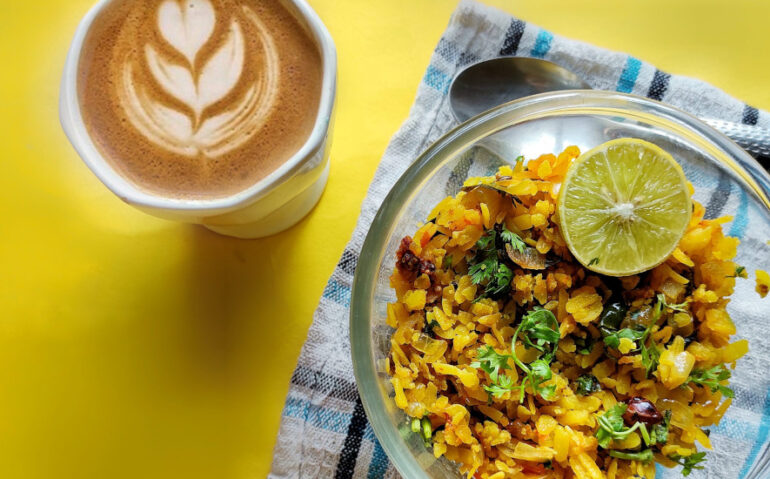
This fluffy, light dish made from flattened rice is a breakfast favorite across India. But is poha good for weight loss? The short answer is yes—if you know how to make it work for you.
Let’s break it down together, no confusing jargon, just real talk.
What Is Poha, Anyway?
Think of rice grains that have been flattened into thin flakes. That’s poha. It cooks quickly, absorbs flavor beautifully, and feels like home on a plate.
It’s:
Low in fat
Made of complex carbs
Rich in iron
Easy to digest
Quick to cook
It’s the kind of meal that’s ready in minutes and still fills you up.
Can Poha Help You Lose Weight?
Yes. But only if you eat it the right way. Here’s why poha works:
Low in Calories: A veggie-loaded bowl is usually around 250 to 350 calories.
Has Fiber: Not tons, but enough—especially when you throw in some vegetables.
Keeps You Full: Complex carbs break down slowly, so you stay full longer.
Energy That Lasts: No sugar crashes or weird hunger pangs an hour later.
It’s all about making smart swaps, not cutting everything out.
What’s Inside Poha That Helps?
Here’s how poha supports your weight goals:
Carbs: But the good kind—complex ones. You stay full, and your energy stays steady.
Protein: On its own, it’s low. But add peanuts, sprouts, or paneer and it levels up.
B-Vitamins: These help your body turn food into fuel.
Iron and Potassium: Iron helps fight fatigue. Potassium supports heart health and keeps water levels in check.
Compared to cereal or a greasy paratha? Poha is lighter, more balanced, and easier on your system.
When Should You Eat Poha for Weight Loss?
Breakfast
Perfect time. It fuels your morning, keeps you alert, and digests easily.
Lunch
Still a solid option. Just make sure it’s got veggies and protein. That combo helps you avoid junk food later.
Dinner
Tricky. Poha is carb-heavy, and eating too many carbs at night might not work if you’re trying to cut weight. If you do eat it for dinner:
Keep the portion small
Use lots of veggies
Add light protein like tofu or sprouts
Skip the fried stuff
How to Make Poha for Weight Loss
Ditch the street-style version dripping with oil. Here’s a healthier take:
Ingredients (Serves 1–2)
1 cup thick poha (washed and drained)
1 tsp oil (use mustard, olive, or coconut)
1 small onion, chopped
1 tsp grated ginger
1 green chili (optional)
1.5 cups chopped veggies (carrot, bell pepper, peas, spinach)
½ tsp turmeric
Salt to taste
1 tbsp lemon juice
Fresh coriander
Protein Add-Ons (Choose 1–2)
1 tbsp roasted peanuts
¼ cup sprouted moong
50g paneer (lightly sautéed)
Steps
Wash and soften poha. Let it sit covered for 5–7 minutes.
In a pan, heat oil. Add mustard seeds, cumin, curry leaves, and chili.
Add onions and ginger. Sauté till soft.
Toss in all the veggies and turmeric. Cook for 4–5 minutes.
Add the poha and salt. Mix gently. Steam for 2–3 minutes with the lid on.
Turn off heat. Add lemon juice and protein.
Garnish with coriander and serve warm.
Pro Tip:
Stick to 1.5 cups per serving. That’s enough to feel full without going overboard.
Can Diabetics Eat Poha Too?
Yes, with a few tweaks. Poha has a medium glycemic index, meaning it raises blood sugar moderately—not too fast, not too slow.
To keep it blood sugar–friendly:
Add lots of veggies
Include protein
Watch portions (1 to 1.5 cups max)
Pair it with yogurt or buttermilk
Skip any added sugar
As always, check your levels and talk to your doctor if you’re unsure.
Poha Isn’t Perfect. Here’s What to Watch For
Even healthy foods have limits. Be mindful of:
It’s Carb-Based: If you’re on keto or cutting carbs, this might not fit.
It’s Processed: Not heavily, but more than whole grains like brown rice.
Calories Add Up: Fried potatoes, sev, or too much oil turn it into a heavy meal.
Low Protein: On its own, it won’t fill all your nutrient needs.
Fix it with smart choices: more veggies, lean protein, and controlled portions.
Smart Tips to Make Poha Work for You
Add More Veggies: Double the usual amount. They bulk it up and add fiber.
Boost Protein: Always include peanuts, sprouts, or paneer.
Use Less Oil: Stick to 1 tsp. Non-stick pans help.
Control Portions: 1 to 1.5 cups max per serving.
Skip the Extras: No sev, no sugar.
Lemon Juice: Great flavor, zero calories.
Hydrate: Drink water before or with your meal.
Stick to Morning or Lunch: It’s more effective that way.
Final Thoughts
Poha is simple, comforting, and surprisingly helpful when you’re trying to lose weight. It won’t do the work alone, but when prepared right, it supports your goals.
Add veggies. Add protein. Use little oil. Watch your portions. Eat it at the right time.
You don’t have to give up the food you love to get healthy. You just have to make it work smarter for you.
Let me know if you’d like a catchy meta description or blog title suggestions too.
If you’ve ever stood over your pressure cooker wondering, “Kitne seeti lagne chahiye?” for Sona Masoori rice, you’re not alone. My cousin Priya calls me every month asking this exact question. Let’s fix this once and for all.
Why Sona Masoori Loves Your Pressure Cooker
Sona Masoori is that light, fluffy rice perfect for daily meals. It cooks fast, doesn’t weigh you down, and pairs with everything from dal to curries. And the pressure cooker? It’s magic for this rice – quick, energy-smart, and foolproof… if you know the trick.
The Big Answer: How Many Whistles?
For most stovetop pressure cookers:
→ 2 whistles on medium heat.
That’s your golden number for separate, tender grains.
But Wait – It Depends
Your rice: Fresher rice? Maybe 1.5 whistles. Older? Stick to 2.
Your cooker: Heavy-bottomed? 2 whistles. Thin pot? Try 1.5 first.
Your texture: Like it firmer? 1.5 whistles. Softer? 2.5.
Start with 2. Adjust next time if needed.
The Real Secret? Water Ratio
Whistles mean nothing without the right water. Use this:
→ 1 cup rice : 1.5 cups water.
Always. Measure with the same cup.
Pro tip: Rinse rice 3 times till water runs clear. Stops mushiness.
My Foolproof Step-by-Step
Rinse 1 cup Sona Masoori rice until water is nearly clear. Drain well.
Add rice to cooker pot. Pour 1.5 cups water.
Optional: ½ tsp salt, 1 tsp oil or ghee (prevents sticking).
Seal cooker lid. Heat on medium-high.
After the first steady steam hiss, lower heat to medium.
Wait for 2 whistles.
Turn off heat immediately.
Let pressure drop naturally – 15 minutes. DO NOT open early!
Open lid. Fluff rice with a fork. Done!
Electric Cooker? (Instant Pot)
No whistles here. Do this instead:
→ Manual/Pressure Cook mode: 4 minutes
→ Water ratio: 1 cup rice : 1.25 cups water
→ Natural release: 10 minutes
Fluff. Serve.
Troubleshooting Your Rice
Mushy/Sticky? You used too much water. Or forced the pressure release.
Hard/Undercooked? Needed more water or half an extra whistle.
Burnt bottom? Heat was too high. Add that spoonful of oil next time.
Final Tip
Let rice sit fluffed for 5 minutes before serving. Spread steam evenly.
So next time, remember: 2 whistles + 1.5 water + patience = perfect Sona Masoori. No more gluey rice or guesswork. Go try it – and tell me how it turns out!
You know that fragrant, buttery rice they serve with Kerala-style biryani? The one with those tiny grains that soak up all the flavors? That’s jeerakasala rice—my grandma’s secret weapon for turning simple meals into celebrations. Let me walk you through how to nail it, just like she taught me.
What You’ll Need
1 cup jeerakasala rice (don’t substitute—this rice is special!)
2 cups water
1 tbsp ghee (or coconut oil for a vegan twist)
1 tsp cumin seeds
2-3 cloves
1-inch cinnamon stick
Salt to taste
Let’s Get Cooking
Step 1: Rinse Like You Mean It Wash the rice under cold water until the water runs clear. This removes excess starch and stops the grains from sticking. Grandma always said, “If you’re lazy here, your rice will punish you later.”
Step 2: Toast the Spices Heat the ghee in a pot. Throw in the cumin seeds, cloves, and cinnamon. Let them sizzle for 20 seconds—you’ll smell the magic when they’re ready.
Step 3: Add Rice & Water Drain the rice and add it to the pot. Stir gently for a minute to coat the grains with ghee. Pour in 2 cups of water, sprinkle salt, and give it a quick mix.
Step 4: Cook Low and Slow Cover the pot, reduce the heat to low, and walk away. Seriously—no peeking! Let it simmer for 15 minutes. After that, turn off the heat and let it sit, still covered, for 5 more minutes.
Step 5: Fluff and Serve Use a fork to fluff the rice. The grains should be separate, fragrant, and slightly buttery.
Pro Tips I Learned the Hard Way
Water Ratio: Stick to 1:2 (rice to water). Too much water turns it mushy.
Don’t Stir: Once the water boils, resist the urge to stir. Trust the process.
Spice Swap: No cloves? Skip them. But cumin is non-negotiable.
Why Jeerakasala Rice Wins Ever wondered why restaurant biryani rice tastes so good? It’s this rice. The short grains absorb spices without losing their bite, and the aroma? Unbeatable. Pair it with a spicy curry, or keep it simple with yogurt and pickle.
Got questions? Try it this weekend and tell me how it goes. And hey—if your rice turns out sticky, don’t sweat it. Mine did too… the first three times.